Back then I was living in Hong Kong, and this Rice Cooker Sticky Rice with Chinese Sausage was my winter-night ritual. Once the rice cooker clicked, the whole apartment smelled like comfort and warmth.
那時我還住在香港,每到冬天晚上,就會煮這鍋糯米飯,電飯煲一跳掣,整個家都香氣滿溢,像是簡單又窩心的慶典。
📜 This post was originally written in 2006 on my first-generation Chinese blog — a time when food writing was all about memories, not metrics. I'm reposting it here to preserve the recipe and story. 這篇文章最早寫於 2006 年的舊網誌,那時的我,純粹是想記下每一道親手做的菜。
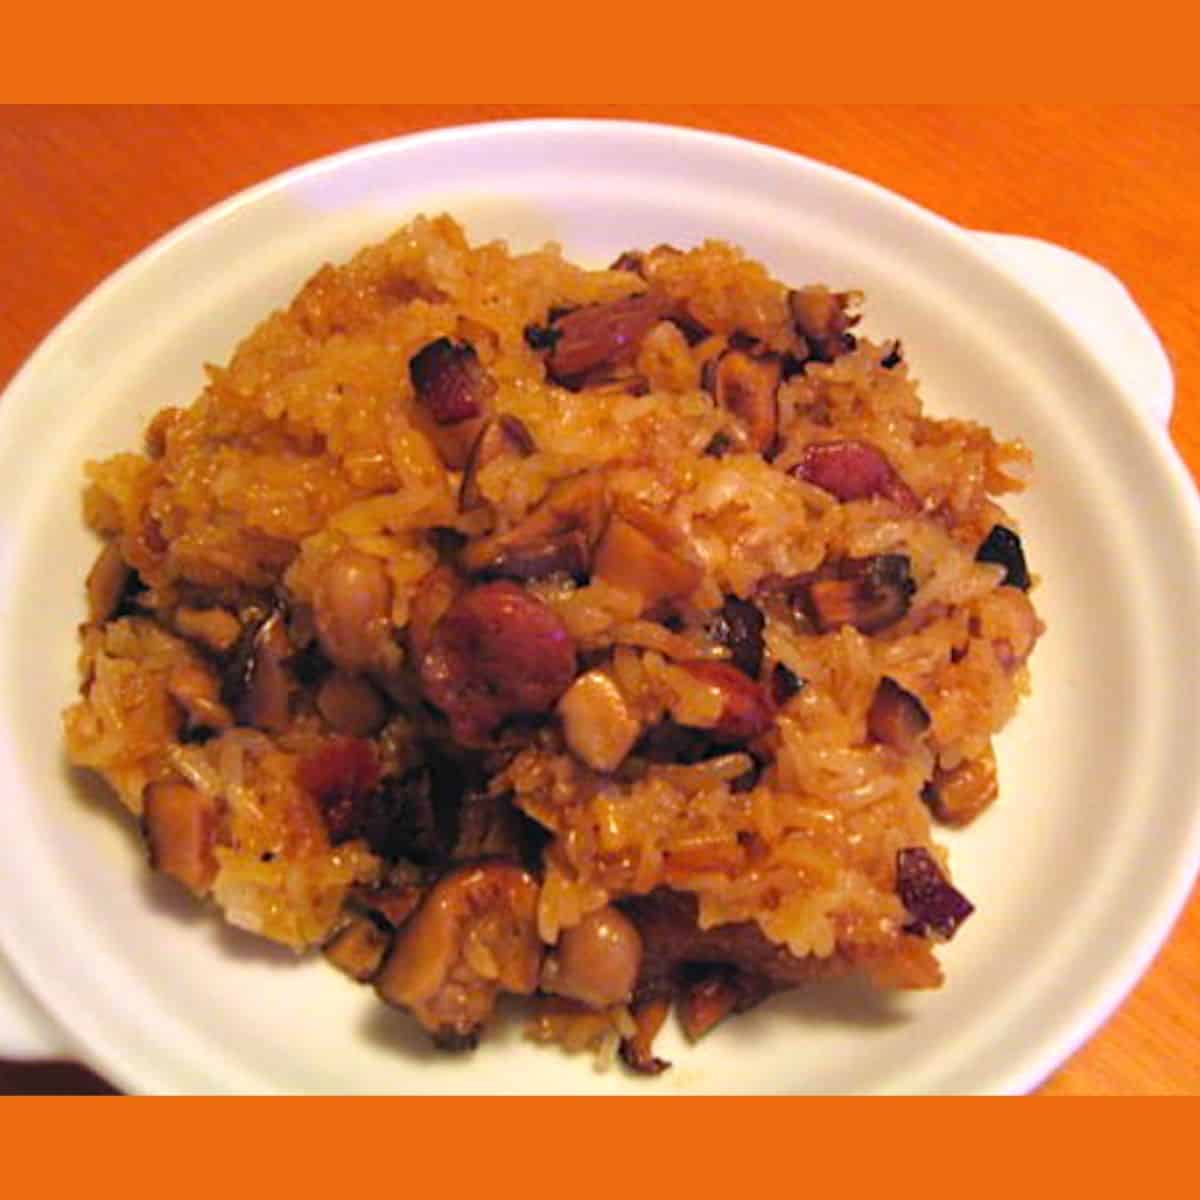
Rice cooker sticky rice with Chinese sausage was our ultimate comfort food on cold winter nights when I was living in Hong Kong. The aroma of lap cheong and garlic filled the tiny flat, warming both the kitchen and the heart.
那時我還住在香港,每到冬天晚上,就會煮這鍋糯米飯,電飯煲一跳掣,整個家都香氣滿溢,像是簡單又窩心的慶典。

Rice Cooker Sticky Rice with Chinese Sausage | 電飯煲臘味糯米飯
Ingredients
- 糯米 150 克(建議浸泡 3 小時)
- 花生 少許
- 臘腸 少許
- 臘肉 少許
- 蝦米 少許
- 蒜泥 1 茶匙
- 蒸魚豉油 2 湯匙 + 水 2 湯匙(混合稀釋)
- 150 g glutinous rice soaked in hot water for 3 hours
- A small handful of peanuts
- A few slices of Chinese sausage lap cheong
- A small amount of Chinese cured pork belly lap yuk
- A small handful of dried shrimp soaked
- 1 teaspoon minced garlic
- 2 tablespoon steamed fish soy sauce + 2 tablespoon water mixed
Instructions
- 糯米用熱水浸泡約 3 小時,瀝乾後放入電飯煲內,按煮飯掣煮至跳掣。
- 用少許油爆香蒜泥,炒香花生、蝦米、臘腸及臘肉。
- 拌入已煮好的糯米,重新按煮飯掣,煮至跳掣。
- 加入稀釋的蒸魚豉油,再次按煮飯掣。完成後焗一會即可上碟。
- Soak glutinous rice in hot water for 3 hours. Drain and cook in a rice cooker until done.
- In a small pan, sauté garlic, then add peanuts, dried shrimp, Chinese sausage, and cured pork.
- Mix everything into the cooked sticky rice. Press the cook button again.
- Pour in the diluted soy sauce, cook one last time, then let sit in the rice cooker for a few minutes before serving.
Notes
- 這做法比起傳統生炒糯米飯更簡單,口感偏軟但很方便。
This version is softer than wok-fried sticky rice, but much easier to make. - 蒜泥炒香後再混入米飯,風味更濃。
Sautéed garlic adds extra depth to the rice flavor. - 可按口味加入冬菇、乾瑤柱或鵪鶉蛋。
Feel free to add shiitake mushrooms, dried scallops, or quail eggs for variation.
More Recipes
Back to HOME


Comments
No Comments